Hi all, today i’m going to post on how to setup Emgu CV with Microsoft Visual Studio. If you are a C# lover and you want to work with Computer Vision and Image Processing then Emgu CV is for you. Emgu CV is a library of wrapper function for calling OpenCV functions from Visual Studio Windows Forms. Let’s look at the steps.
1. Download Emgu CV from http://www.emgu.com/wiki/index.php/Download_And_Installation. I’ll be using the latest version 2.4.10. After the download then you can install it to a prefered location for example C:\emgu

2. Setting Emgu CV path to System Environment Path
Now you must add $emgu\emgucv-windows-universal-cuda 2.9.0.1922\bin\x86 to System Environment Path. Here $emgu means the installation directory and if you are using x64 bit OS then the path would be $emgu\emgucv-windows-universal-cuda 2.9.0.1922\bin\x86. Here “emgucv-windows-universal-cuda 2.9.0.1922” is your Emgu CV version.
3. Creating a Windows Forms Application
Start up Visual Studio. (I’ll be using Visual Studio 2012 these steps will be very much the same for 2010 and newer versions as well)
Go to File -> New Project
In there under other languages and from there under C# select Windows Forms Application. You can give a name and select a location in that menu.

After clicking OK a Visual Studio will create a new Windows forms application for you.
4. Configurations inside Visual Studio
4.1 Go to Project and then Add Reference or you can right click on project name in solution explorer and select Add Reference.


Then Reference Manager menu will pop up. From there select Browse. Then browse to $emgu\emgucv-windows-universal-cuda 2.9.0.1922\bin folder.
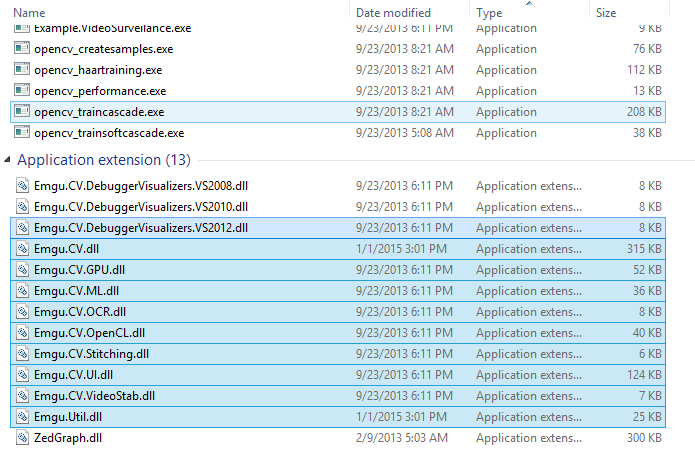
From there select the Emgu dlls as shown below and note that you have to select the Emgu.CV.DebuggerVisualizers dll according to the Visual Studio version you are using. For example here i’m selecting Emgu.CV.DebuggerVisualizers.VS2012.dll as i am using Visual Stusio 2012.
Then click add and then click OK. In the solution explorer you can see that the references are added properly to your project.
4.2 Now go to Project and Add Existing Item or you can right click on solution explorer and go to Add and then select Existing Item.


Browse to $emgu\emgucv-windows-universal-cuda 2.9.0.1922\bin\x64 (or to $emgu\emgucv-windows-universal-cuda 2.9.0.1922\bin\x64 if you are working on a x86 OS ). Most probably nothing might appear there. You must select to show Executable Files or All Files in the bottom right corner of the menu.
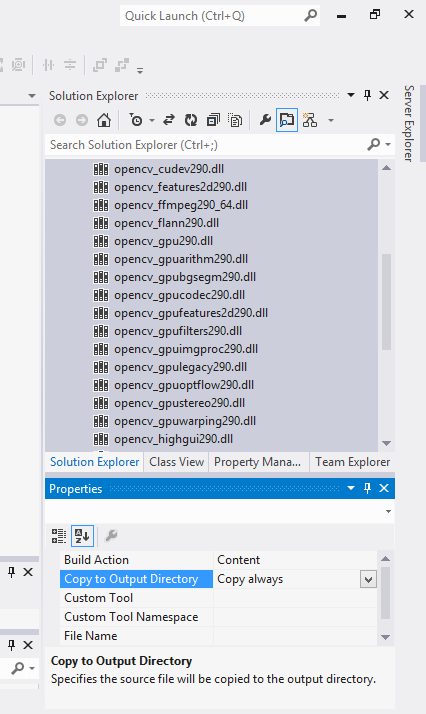
4.3 Select all the files that starts in opencv and ends in dll. Then click Add.
Now highlight those added existing items and go to Properties and change under copy to output directory to Copy Always.
4.4 Customizing C# Environment (Adding special Emgu GUI elements )
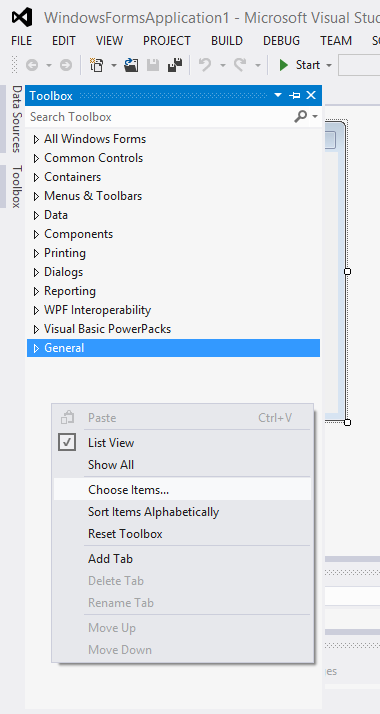
Right click in toolbox menu and select Choose Items. Then Choose Toolbox Items will pop up.
Then browse to $emgu\emgucv-windows-universal-cuda 2.9.0.1922\bin and select Emgu.CV.UI.dll. Then you can see that ImageBox element is added. By default it is checked if not put the check mark and press OK.
Thats about it for the setup.
Note about “The type initializer for ‘Emgu.CV.CvInvoke’ throwing an exception’ :
There is a solution for that in Emgu CV wiki page here.
Good Luck.
~Rajind Ruparathna

thank you very much
LikeLiked by 2 people